
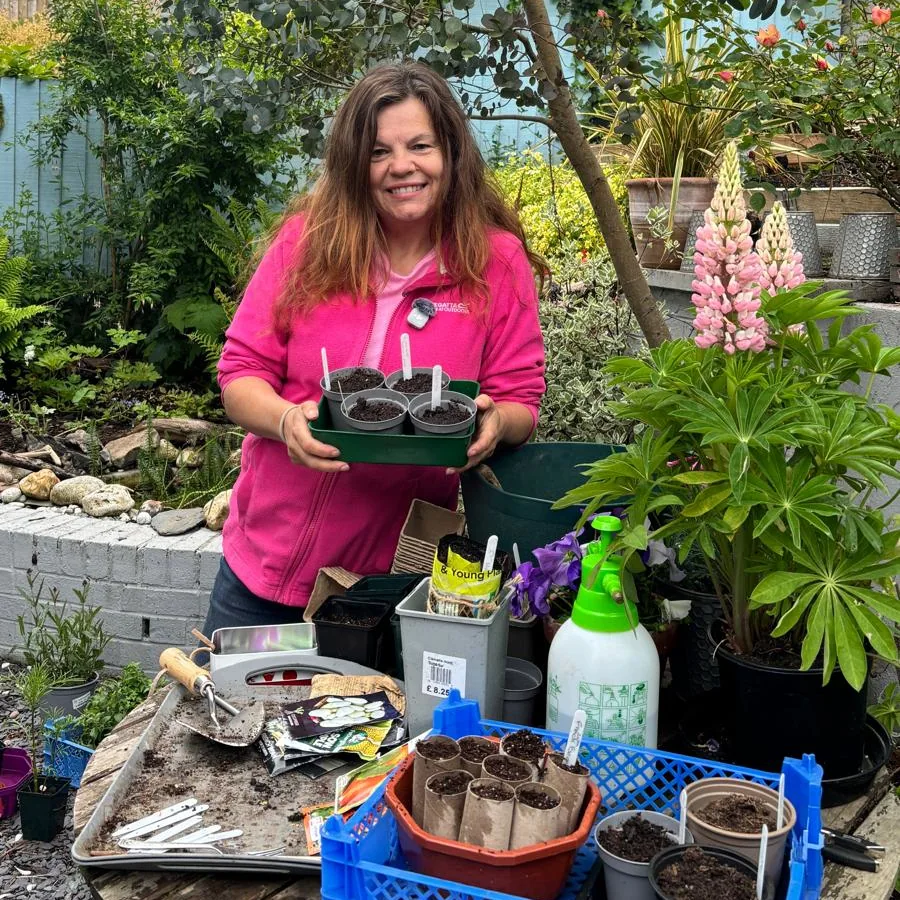
Dirt Under My Nails
May is the month gardening stops being about preparation and starts being about doing. The last frost date passes, the soil warms, and suddenly everything is urgent in the best possible way. There’s a particular satisfaction to May that I don’t think any other month quite matches — the moment you can finally get things in the ground for real.
My own garden is small. Urban, hemmed in, overlooked on three sides. And right now, it is absolutely bursting. A small pond, a few raised beds, pots crammed onto every hard surface, climbers scrambling up whatever they can reach. May proves every year that space really isn’t the limiting factor — we are.
This month I’m talking about planting out, direct sowing, why alliums deserve a permanent place in every garden, how to feed your plants for free (with a warning about the smell), a brilliant low-cost hardening off solution, and how even the tiniest pond can transform your garden for wildlife. There’s a lot to get through.
This Month: May Essentials
May is fundamentally about one thing: getting plants out of the protection of your home and into the ground where they belong. But timing matters enormously and rushing this step is one of the most common mistakes I see.
Planting out tender veg and annuals.
Wait until after the RHS Chelsea Flower Show — the last week of May — before putting out anything that won’t survive a frost. Courgettes, squash, French beans, basil, cosmos, dahlias: they all want warmth in the soil as much as warmth in the air. If you’ve been hardening off (see the Kit section below for my low-cost method), your plants will be ready. If you haven’t started yet, begin now — two weeks of gradual outdoor exposure before planting makes a dramatic difference to how plants establish. Warning – don’t forget to bring your hardening off plants in like I did!
Direct sowing outside.
Now the soil has warmed you can sow a lot directly where they’re to grow: beetroot, chard, spring onions, dwarf French beans, courgette — they germinate fast and often outperform transplants. Prepare crumbly soil by weeding, removing stones and raking. Sow thinly, water in gently and be patient. Do be careful of slugs and snails, they love munching on tender seedlings. Watch my reel on safe slug prevention – https://www.instagram.com/reel/DXLmmXvhwY9/?utm_source=ig_web_copy_link&igsh=MzRlODBiNWFlZA=
Don’t forget successional sowing.
Sow a short row of salad leaves, radish, spring onions and spinach every two to three weeks throughout May and June and you’ll have continuous harvests rather than a glut followed by nothing. Five minutes of effort, months of reward.
Plant of the Month: Alliums
If I had to pick one plant family that every garden — however small — should include, it would be alliums. Ornamental alliums in particular are having a well-deserved moment, and once you know how to grow them, you’ll never be without them.
Alliums — the ornamental relatives of onion and garlic — produce those extraordinary spherical flowerheads on long straight stems in May and June. They’re architectural, long-lasting, and absolute bee magnets. Watch an allium in full flower on a warm day and you’ll lose track of time counting the pollinators on it.
The most cost-effective approach: plant bulbs in autumn
Ornamental allium bulbs are planted in autumn, and this is by far the most economical way to grow them — a bag of bulbs goes a long way, and you’ll have them for years.If you don’t have them in yet, make a note now and revisit in October. Your May 2027 self will thank you.
For instant impact this year: buy ready-grown plants now
Garden centres have pot-grown alliums available right now and they’re worth picking up for an immediate display this season. They cost more than bulbs but they deliver results straight away, you’ll get to see exactly where you want more next year and you can plant those bulbs out again in autumn.
Growing alliums in containers
Alliums do beautifully in containers, which makes them ideal for small gardens and patios. Use a good peat free multi-purpose compost, choose a pot with good drainage and plant bulbs at roughly twice their depth in autumn. In containers they can dry out more quickly, so keep an eye on watering during dry spells — though they do prefer to be on the drier side rather than sitting in wet compost.
Plant them amongst grasses
One of my favourite ways to use alliums is growing them through ornamental grasses — stipa, pennisetum, miscanthus. The soft, flowing texture of the grass sets off the bold spherical heads perfectly, and as the allium foliage dies back (and it will look tatty — this is unavoidable), the grass hides it completely. Naturalistic, low-maintenance and genuinely beautiful.
Varieties worth knowing
Allium ‘Purple Sensation’ is a classic — deep violet, reliable, 60–70cm tall. ‘Gladiator’ is taller and paler, excellent for cutting. ‘Mount Everest’ is a beautiful white that works well in wilder planting schemes. For small gardens or containers, Allium hollandicum fits neatly without overwhelming.
Leave the seedheads on after flowering. They remain architecturally interesting well into summer, and the birds will thank you for them in autumn.
🥗 Veg of the Month: The Cut-and-Come-Again Salad Bowl
If you only grow one thing this May, make it a cut-and-come-again salad container. It’s one of the most rewarding, practical and genuinely useful things you can do in a small garden — and you don’t even need a raised bed. A large pot, a window box, even a deep tray will do.
What to sow
Look for mixed salad leaf seed packets labelled ‘cut and come again’ — they typically include a mix of loose-leaf lettuces, rocket, mizuna, mustard leaves and spinach. You can also make your own mix. Sow thinly on the surface of good peat free multi-purpose compost, cover lightly with a fine layer of compost and water gently from below.
How to harvest
The key is in the name. Use scissors to cut leaves when they’re 8–10cm tall, leaving about 2–3cm of growth above the compost. The plants will regrow and give you another cut in two to three weeks. One sowing can provide three or four cuts before the plants start to bolt.
Keep sowing
Sow a new container every three weeks from now until late July and you’ll have fresh salad leaves from your garden right through to October. It sounds simple because it is — this is genuinely one of the easiest and most satisfying things to grow.
Watch out for
Slugs love young salad seedlings. Raising containers slightly off the ground helps, and a ring of copper tape around pots can be effective. I also find that watering in the morning rather than the evening makes a real difference — wet compost overnight is an open invitation to slugs and snails.
🌿 Guru’s Quick-Fire Tips
The Chelsea Chop — and why it matters
The last week of May is traditionally known as the Chelsea Chop, named after the RHS Chelsea Flower Show that takes place at the same time each year (19–23 May 2026). It’s the signal to plant out tender plants safely, and also the time to cut back certain perennials — sedums, helenium’s & echinacea — by about a third, to delay flowering and create bushier, less floppy plants. Cut back geums and cottage geraniums to encourage a second flush of flowers. Cut half your clump and leave the other half for a staggered display.
Water in the morning
As temperatures rise, morning watering really starts to matter. It means foliage dries during the day, reducing fungal problems — and crucially, wet soil and wet compost overnight actively encourage slugs and snails. Morning watering isn’t always possible every day but make it your default whenever you can.
Feed for free — but be warned
May is when containers and hungry veg need regular feeding, and you don’t have to spend a penny. Comfrey and nettles both make brilliant liquid fertilisers — steep a large bunch of leaves in a bucket of water for a couple of weeks, dilute 1:10 and apply to the roots. It works wonderfully. I’ll also be doing a reel soon on making fertiliser from seaweed, which I collect locally from the coast — genuinely one of the best plant feeds you can use.
Fair warning though: all of these homemade feeds smell absolutely awful. Keep the bucket well away from anywhere you sit outside. You have been warned!
🛠️ Kate’s Kit: Tool of the Month
This month it’s less a tool and more a method — and it costs almost nothing. If you’ve been growing seedlings on a windowsill and you’re wondering how to harden them off without a greenhouse or coldframe, this one’s for you.
Make your own coldframe
A simple coldframe can be made from four pieces of timber and an old window or sheet of clear polycarbonate for the lid — often free from salvage yards or Facebook Marketplace. It doesn’t need to be pretty. It needs to let light in, protect from frost overnight, and allow you to prop the lid open during the day to increase ventilation gradually over two weeks.
In early May, keep the lid mostly closed overnight and open it a crack during the day. By mid-May, leave it fully open during the day and just close it at night if frost is forecast. By the last week of May, your plants will be fully hardened off and ready to go out.
No timber? The goal is simply to create a buffer zone between the warmth of indoors and the reality of the great outdoors so you can easily use a plastic, see through storage crate and use in the same way as above. Watch my simple reel below.
https://www.instagram.com/p/DVAsPIbjCHv/
🐸 Wildlife Watch:Have a Pond
I want to spend a little longer here this month, because if there’s one thing I’d encourage every gardener reading this to consider, it’s a wildlife pond. Even a tiny one.
It doesn’t need to be big
A half-barrel, a Belfast sink, a large, glazed pot sealed at the base — all of these make perfectly good wildlife ponds. The key is that creatures can get in and out safely, and that it has no fountain or pump (wildlife prefers still water). If you’re using a container without a natural slope, add a ramp such as a submerged piece of wood leading to the surface. It’s also super important to have oxygenating plants as small ponds can go green quickly and these will help keep the water clean.
Build in structure
The best wildlife ponds have variety. A shallow ‘beach’ of pebbles and gravel at one end — gently sloping — gives frogs, toads, hedgehogs and birds a safe way in and out. A pile of logs at the edge creates damp, sheltered habitat for beetles, newts and toads to hide in during the day. Large stones half-submerged at different depths give aquatic insects somewhere to rest and emerge from the water.
Plant right up to it
The margins of a pond are as important as the water itself. Plant moisture-loving plants around the edges — iris, marsh marigold, ragged robin, water forget-me-not — and allow taller plants like grasses or sedges close by to give cover. Small mammals and amphibians feel vulnerable in the open and are far more likely to use a pond that feels sheltered and safe.
What you’ll attract
In my own tiny urban pond I get frogs every year, and the dragonflies and damselflies are extraordinary.— and watching them hunt over the water on a warm afternoon is one of the genuine joys of my garden. They’re also brilliant predators of aphids and other garden pests, so they earn their keep.
Pond skaters, water boatmen, diving beetles — these will find your pond within days of it being filled. You don’t plant them or add them. They simply arrive. That never stops being remarkable to me.
Top Tip – if you have a small pond and find it difficult to keep clear, add a few drops of a food grade black dye (completely safe to wildlife) This blocks out the sun and stops the water going green.
Watch my pond reel below
Other wildlife notes this month: Keep bird feeders stocked and fresh water available, and avoid large food pieces such as whole peanuts during nesting season.
🌱 A Quick Word Before You Go
Something I get asked a lot is whether I ever offer more in-depth advice beyond the reels — longer guides, step-by-step seasonal plans, that sort of thing. The honest answer is: yes, and it’s something I’m working on.
This newsletter is the first step, you’ve signed up for something that goes a little deeper than a 60-second reel. Over the coming months I’m planning to expand what I offer here, including more detailed growing guides and eventually the option to access exclusive content.
If you know someone who’d enjoy this, do please forward it on. The more gardeners in this community, the richer it gets — and the more I can justify building more for you.Wash pots, clean and sharpen tools and sort your shed out ready for the big push in spring!
🌱 Come and Grow with Me
If you’re not already following me on Instagram and Facebook, that’s where I post three reels a week — practical, calm, no-nonsense gardening from a small urban garden and a brand new, overgrown allotment, and 25 years of hands-on experience.
📱 Instagram: @gardenerguru
📱 Facebook: @gardenerguru
And if you’d like personalised advice for your own garden, I offer one-to-one in person and via zoom consultations.


